Crochet Axolotl: Free Amigurumi Pattern with Frilly Gills
A pink axolotl with six feathery gills, stubby legs and a flat paddle tail — the trickiest-looking part is six tiny chains, and we walk through all of them.

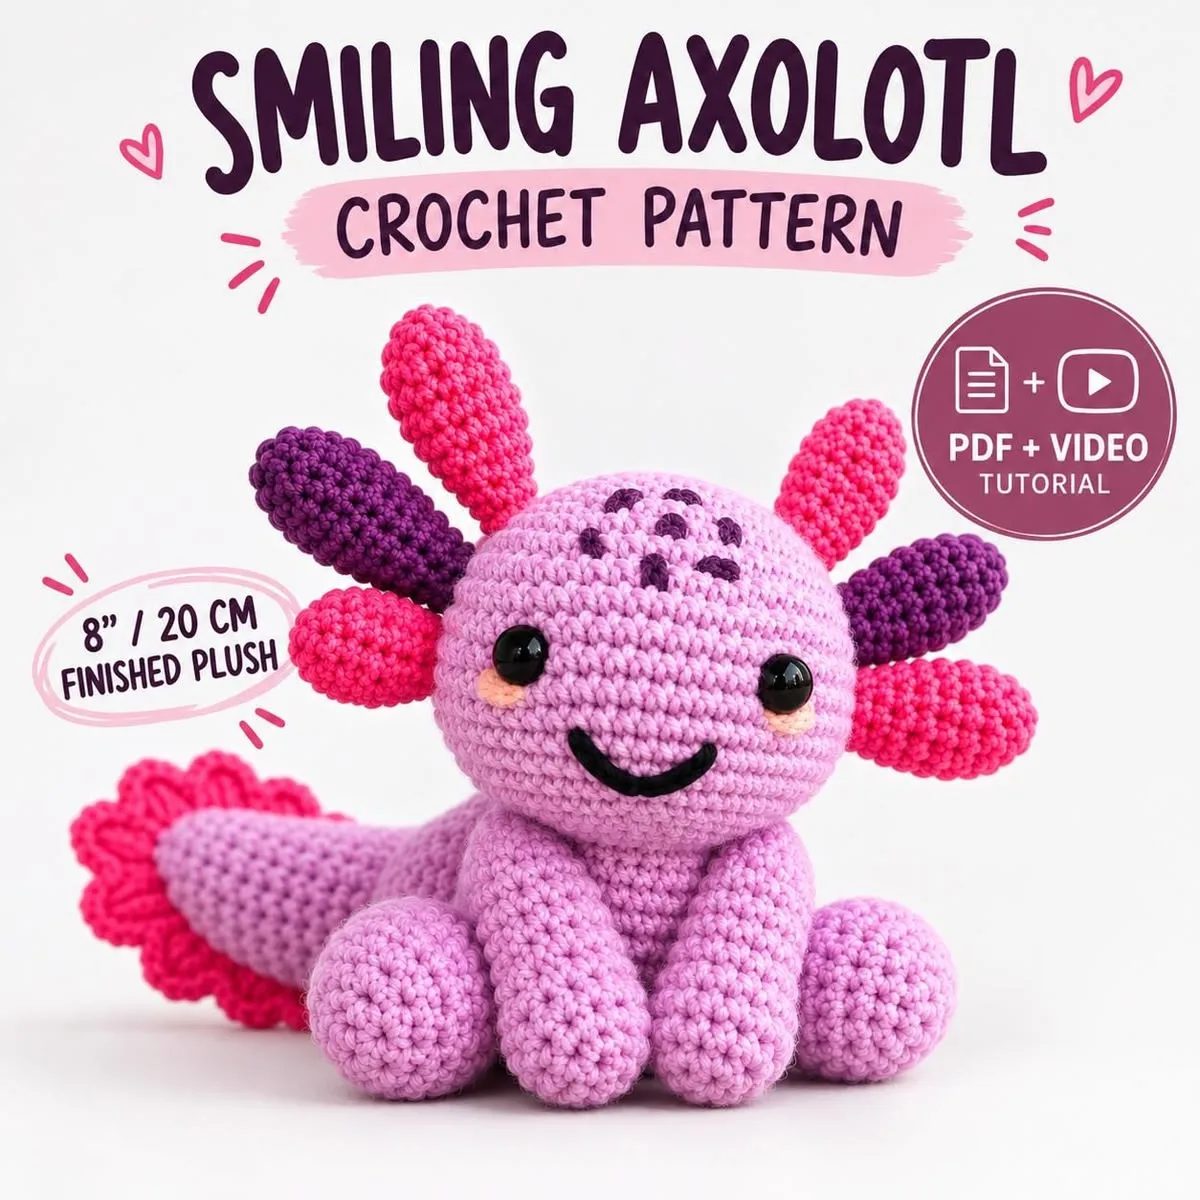
Pattern at a glance
US terms- Skill level
- Easy
- Yarn
- Worsted (#4) in pink, about 70 yd
- Hook
- 3.5 mm (E-4)
- Time
- About 3 hours
- Finished size
- 7 in (18 cm) nose to tail
You'll need
- Worsted weight (#4) yarn in pale pink — about 70 yd (64 m)
- A small amount of deeper pink for the gills
- 3.5 mm (E-4) crochet hook
- Two 8 mm safety eyes (or black yarn)
- Polyester fiberfill
- Stitch marker, tapestry needle, scissors
In this post
The axolotl has been the most-requested amigurumi for three years running, and it's easy to see why: a permanently smiling face, a tail like a paddle, and six ridiculous frilly gills.
Those gills look like the hard part. They aren't — each one is a short chain with stitches worked back along it, and there are six. The body is a single piece worked head-first.
Abbreviations (US terms)
- MR magic ring · sc single crochet · inc 2 sc in one stitch · dec invisible decrease
- hdc half double · dc double crochet · ch chain · sl st slip stitch
Worked in a continuous spiral. Keep a stitch marker in the first stitch of every round.
The rest of this post is just below — free, as always.
The pattern
Head and body (one piece, pale pink)
- Rnd 1: 6 sc in a MR. (6)
- Rnd 2: Inc in each st around. (12)
- Rnd 3: (Sc 1, inc) 6 times. (18)
- Rnd 4: (Sc 2, inc) 6 times. (24)
- Rnd 5: (Sc 3, inc) 6 times. (30)
- Rnds 6–12: Sc in each st around. (30)
Fit the safety eyes between Rnds 8 and 9, about 8 stitches apart — wide-set eyes are what make an axolotl look like an axolotl.
- Rnd 13: (Sc 3, dec) 6 times. (24)
- Rnd 14: (Sc 2, dec) 6 times. (18)
- Rnds 15–16: Sc in each st around. (18)
Stuff the head firmly. The body continues from here, lightly stuffed.
- Rnds 17–24: Sc in each st around. (18)
- Rnd 25: (Sc 1, dec) 6 times. (12)
- Rnds 26–28: Sc in each st around. (12)
The tail
Flatten the final round so the body is squashed top-to-bottom, then work through both layers:
- Row 1: Sc 6 across the flattened edge. (6)
- Rows 2–4: Ch 1, turn, sc in each st across. (6)
- Row 5: Ch 1, turn, dec, sc 2, dec. (4)
- Row 6: Ch 1, turn, dec twice. (2)
Fasten off. The tail stays flat and unstuffed — that's what makes it look like a paddle.
Legs (make 4, pale pink)
- Rnd 1: 5 sc in a MR. (5)
- Rnds 2–4: Sc in each st around. (5)
No stuffing. Fasten off with a long tail for sewing.
Gills (make 6, deeper pink)
Each gill is one chain worked back along itself. Read it once slowly and the rest are quick:
- Step 1: Ch 7.
- Step 2: Working back along the chain: sl st in the 2nd ch from the hook, sc in the next, hdc in the next, 4 dc in the next ch (this makes the fan), hdc in the next, sc in the last.
- Step 3: Fasten off leaving a long tail. (1 gill)
Assembly
- Step 1: Sew three gills to each side of the head around Rnd 10, fanning upward and backward. Pin all six first and look at the axolotl head-on before committing.
- Step 2: Sew the front two legs just behind the head, at around Rnd 16, and the back two at around Rnd 24.
- Step 3: Embroider a small, wide smile between and slightly below the eyes — one gentle curve is enough.
- Step 4: Optional: two tiny straight stitches of blush yarn under each eye for cheeks.
Make it your own
- Wild type: dark brown-grey body with deep red gills, which is what axolotls look like in the wild.
- Golden axolotl: butter yellow body, peach gills.
- Tiny keychain: DK yarn and a 2.5 mm hook; stop the body at Rnd 20.
- Pair it with the sitting frog for a whole pond shelf.
Common questions
Why do my gills flop down?
They're sewn too low, or only tacked at one point. Attach each gill along the first two or three stitches of its chain so the base is rigid and the frill stands out.
Can I make the axolotl bigger?
Yes — the same pattern in bulky (#5) yarn with a 5 mm hook comes out around 11 in (28 cm). Everything else stays identical.
How many gills should an axolotl have?
Six: three on each side. Real axolotls have three feathery gill stalks per side, which is exactly what this pattern copies.
Is this suitable for a baby?
Only with embroidered eyes instead of safety eyes, and with every end woven in securely. The gills are sewn on, so stitch them down firmly along their whole base.
What colour is yours? Tell us below — we're collecting the whole rainbow. 🩷
Did you make this?
Tap a star to rate this pattern — it helps other makers find it.
Be the first to rate it!
YarnBloom
Crochet patterns & tutorials
YarnBloom shares cozy, beginner-friendly crochet patterns written in clear US terms, with a stitch count on every round and tips for the tricky bits. Grab your hook — let’s make something lovely.
You might also love
Crochet Frog: The Free Sitting Frog Pattern Everyone Wants
Crochet Bee: A Free Beginner Amigurumi in One Hour
Crochet Mushroom: Free Pattern for a Spotted Toadstool
Easy Crochet Cat Pattern: A No-Sew Cat With Built-In Ears
Leave a comment